Monday, November 30, 2009

Stamping on a Budget - Week Two: Faking it

If you can't beat 'em, fake it.

Yeah, that's right, fake it. Today we're looking at ways of getting WAY more mileage out of some of the tools you may already have. I've browsed through tons of cards and projects wishing I had what looks like the amount of tools some people have. I mean, I just can't buy all that stuff, I wish I could, but I just can't keep up. Feel the same way? Yeah, thought so. Here are a few ways to create the same look while saving a few bucks.

Nestabilities
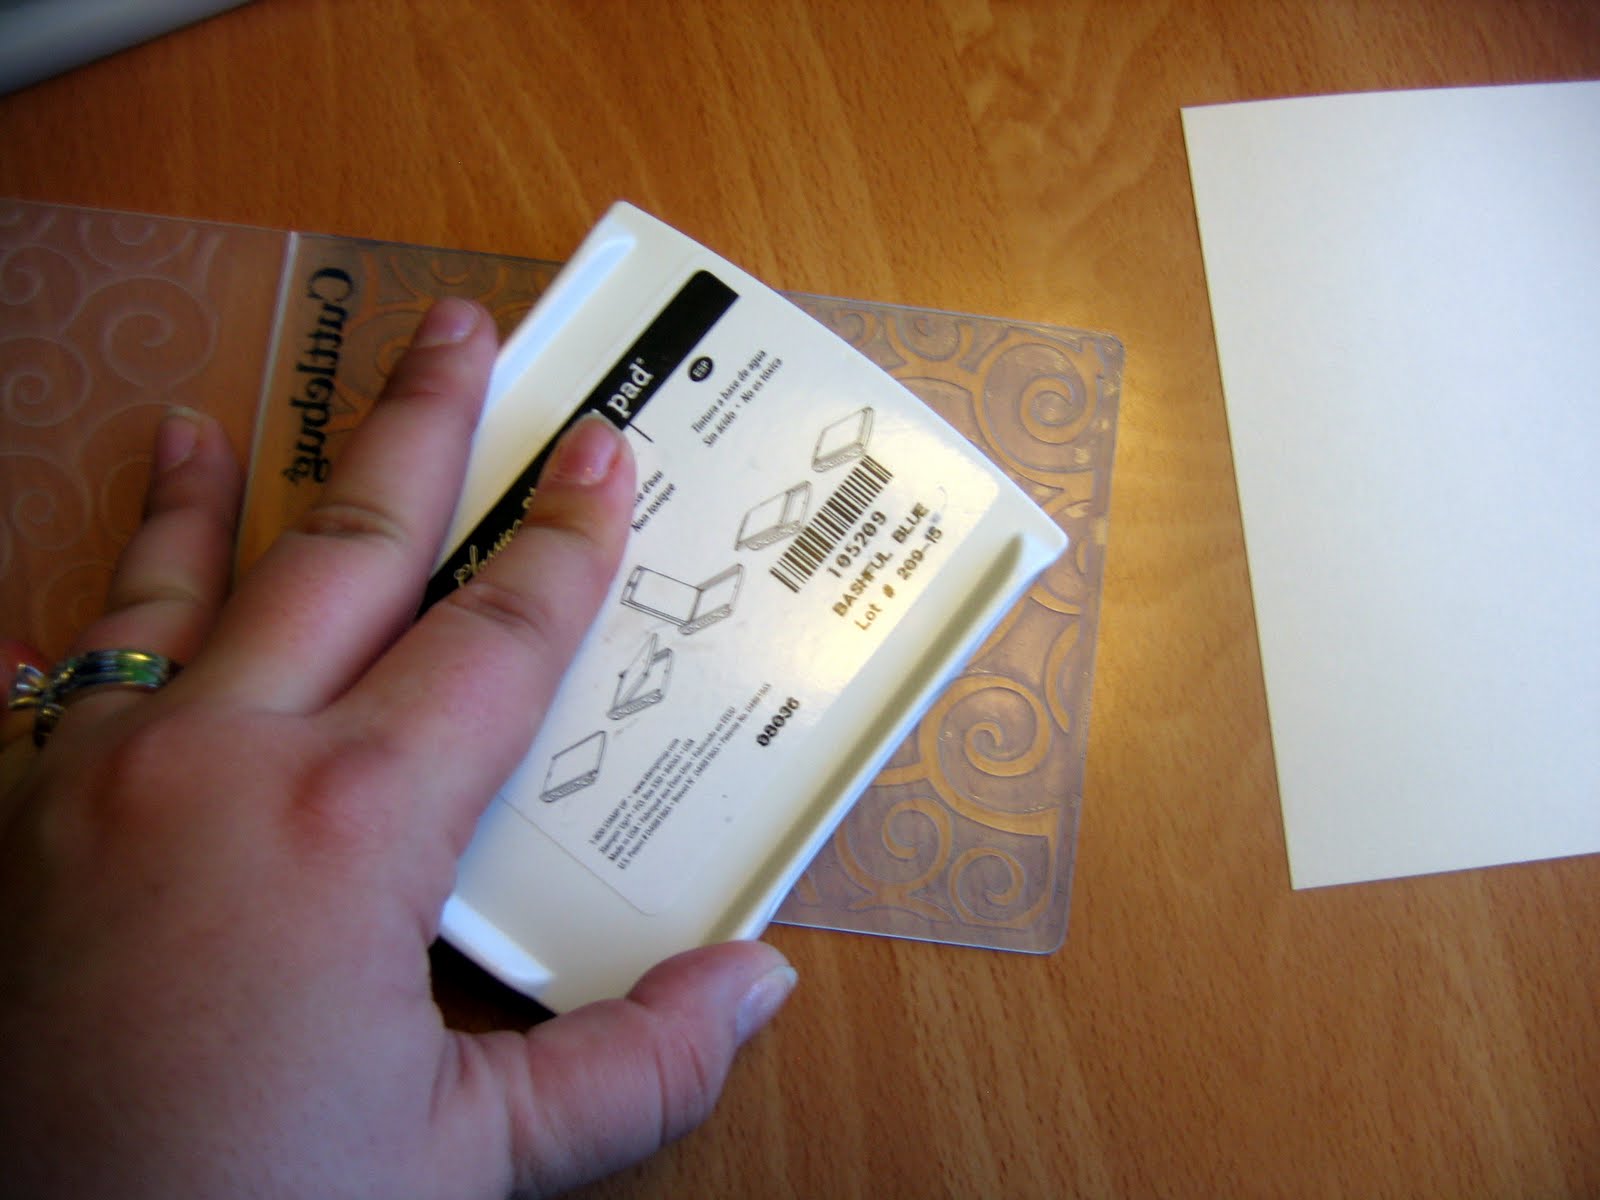
Just by cutting your cardstock, then turning the die and cutting again, you can create some really nice looking shapes for your projects. Check out Melanie's blog for all the deets on what you can create and how.

Big Shot
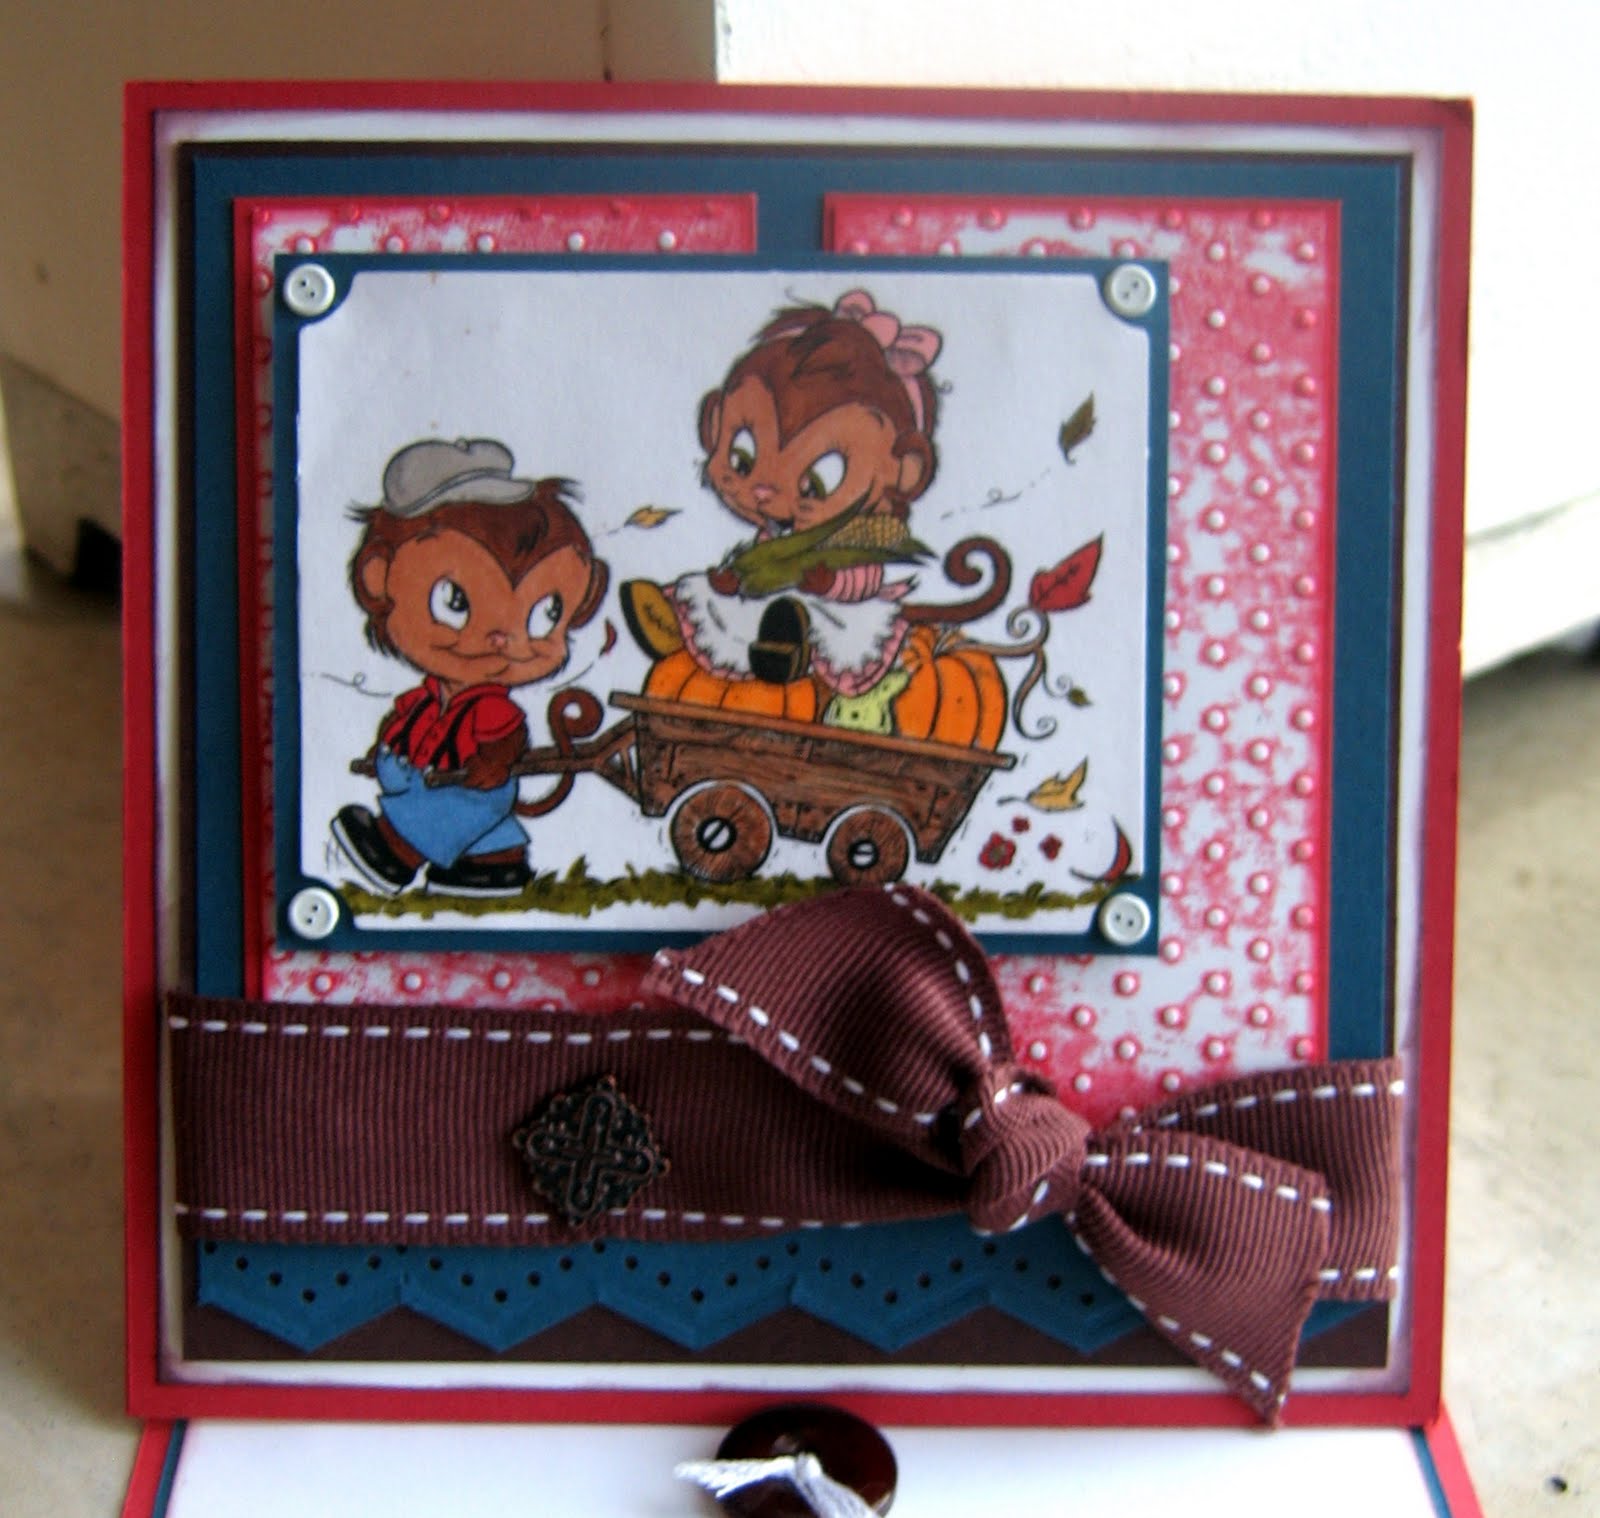
A ton of people own the Big Shot Top Note die. It's perfect for backgrounds on cards. Here's an old card I made using the die.


Did you know that, like the nesties, by turning the die you can create a totally different look? Here's a card I made a while ago with the altered top note die.


See, tons of people will have the die, but not many people think to use it this way. They'll be begging you to tell them where you bought this new die! Hehee.

Tune in next Monday for some more tips on stamping on a budget.

Rebecca

Stamping on a Budget - Week One: Digital

I don't know about you, but I love to browse through Split Coast to see if there are any stamps I've either never noticed before, or maybe some new ones that catch my eye. Since I lost my job I've had to get a little more creative to stretch my craft budget. I of course have mounds of paper that should last me to eternity, being a paper hoarder, but the desire to always buy more paper, stamps and tools is always there too. Here are some ideas on how to stretch that budget.

Consider using digital stamps

I know this is stretching your comfort zone if you're a hardcore stamper because there's no rubber or ink involved. It took a lot for me to wrap my mind around the idea, but you know what, there are so many benefits to them. Here are a few;

>Budget Friendly - you can often find digital stamps for as low as a third of the price you'd pay for the same rubberized image.

>Space Saving - save it to your computer and you're done! Just don't forget to back up your files. Oh, I guess I should probably do that myself. ;)

>Instant Gratification - shop from home and often receive the digital files instantly, or within 24 hours. No longer wait a week or two for your stamps to arrive before you can play! No shipping costs either!

>Size Matters - digital stamp files can quickly and easier be altered to suit your projects. Resize them, flip the stamp for a mirror-image look, add, colour, or alter them in other creative ways.

>Freebies - it's a lot easier for stamp companies to offer free stamp images without the cost of shipping. Most companies that carry digital stamps also offer free trial images. If you're not sure and want to try before you buy, there are several out there that offer these.

>Earth-friendly - with digital you never need to worry about packaging and little energy is waster in the delivery.

Here are some of my favourite stamp companies that offer digital stamps;

Dz Doodles
Dustin Pike
All That Scraps
Mo's Digital Pencil Shop
The Greeting Farm

Here are some cards I've made with digital stamps;


digital stamp from All That Scraps


digital stamp from The Greeting Farm


digital stamp freebie from Dustin Pike


digital stamp from Dz Doodles

Tune in next Monday for another great cost-saving tip!

Rebecca

Foil Embossing Tutorial

Hello there!

I've got some great tips on a new technique today. It's called foil embossing. That's right, like tin foil you find at the grocery store. It's so easy and the results are so cool!

Here's what you'll need:

Tin foil (heavy duty works best)
Embossing folder
Cuttlebug (or other die cut machine)
Cardstock
Adhesive


Start by cutting a piece of tin foil about 5-1/2"x4-1/2". Place your foil inside your embossing folder carefully. This foil is fragile stuff! If you're using a cuttlebug, lay the A plate down, then the B plates, sandwiching your folder between the B plates.


After running it through the cuttlebug, your foil should look something like this;


Next, apply your choice of adhesive liberally to a piece of cardstock about the same size as the foil. Place foil on cardstock and pat gently as not to tear the foil. We're attaching the foil to the cardstock so it'll be easier to trim the edges of the foil without as much tearing.


Trim your foil to the size you desire and position it to your card. Here is my finished card;


I used the cute little snowman stamp from the "Let it Snow" set from Creative Clear Stamps.
Hope you enjoyed this simply but eye catching technique. The foil look is great for the holidays, but could also be beautiful when making wedding or shower cards as well.
Have fun!
Rebecca

Tuesday, November 24, 2009

Dry Embossing Tutorial

Hello There!

Happy Tuesday! Okay, so there isn't much happy about Tuesday, but at least Monday's over. I have a new technique I'd like to show you. It's called dry embossing. I'll show you what I mean.


I took an ordinary embossing folder and made a really cool backdrop for a sentiment I really liked from Creative Clear Stamps. This background is also really cool when making Holiday cards. It has such an icy cool snowy look when it's blue. How did I achieve this look you might ask? It's SO simple you're not going to believe it!

Supplies needed:
Plain cardstock (I used Very Vanilla)
Ink pad (I used Bashful Blue)
Embossing folder
Die cut machine
Paper cutter
A big cup of tea


First, take your ink pad, open the embossing folder and smoosh ink all over the inside of the folder. Only one side is needed.


Next carefully place your paper inside the folder. Close your embossing folder and run it through the die cut machine as you normally would.


Tada! Your finished product should look something like this;


Just sit it out for a few minutes to fully dry, trim, and you're ready to use it on your projects. Pretty cool looking effect, right? You can experiment with so many different types of ink, paper and embossing folders. It's so fun! Here's my finished card.


Have fun!
Disclaimer: I am not responsible for any addiction resulting in experimenting with this technique. Please seek help if your craft room is filled with dry embossed cardstock.
Rebecca

Wednesday, November 18, 2009

Another WILD card...no this isn't Crazy Eights..


I'm having a lot of fun with the second wild week on the TGF blog. The challenge is to make a card/project using an animal designed by Marina Neira available at TGF. We're also challenged to use a sketch. Such fun! I tried really hard not to add additional embellishments to this card. I really wanted the bunny to stand out.


What do you think?

Check out some other designs for this challenge in the TGF gallery here.


Rebecca

Tuesday, November 17, 2009

It's all in the details...

Hello!

I thought we could have some fun and think outside the box today. I'd like to share some ideas on how to make your Thanksgiving dinner party a little more unique. That is, if you're lucky enough to host Thanksgiving this year. You think I'm crazy to be saying you'd be lucky, right? Well, actually, the planning can be a lot of fun. I'll show you what I mean.

With the Turkey Day clear rubber stamp set from CCS you can really add some colourful flair to your holiday table. This set is definitely one of my favourites. I just love, love, love the little turkey included with the set. C'mon, he's adorable! If you're like me you don't have a ton of time to think and plan out the details. That's why I love this little turkey. He's about 1.5"x 1.5" round so I grabbed my circle punch and punched that turkey out! Don't worry, no actual turkeys were harmed...

Here's a placecard I made with him using some decorative paper I had on hand. I stuck with fall colours. Placecards are great because they leave a person feeling welcome and special. They're really easy to make too.


Another idea is to make some wine tags. You know, that way Uncle Bob won't get confused when he places his wine down and forgets which is his. Uncle Bob, you know, everyone has an Uncle Bob!


For the wine tags I used the gobble stamp from the same stamp set, punched it with my circle punch again and threaded some straw-like ribbon through it for a fall decor look. Again - a very easy project!

If you have some extra time you could sponge the sides to give it a warmer look or write names on the back of the wine tags to make them more personal. You could also use these punched out images on napkins rings. Don't own napking rings? That's okay! If you have some ribbon handy, simply tie the ribbon around the napkin, and add the stamped image to the ribbon with some glue dots. Remember that the rustic/messy look actually works well for fall.

Thanksgiving's coming soon! I'm so thankful for my good health and family. What are you thankful for?

Rebecca

Sunday, November 15, 2009

Spa Day!

Hi there!

Check out Club Anya today to see the new releases. There's a "Spa" blog hop going on today until 8pm CST. You can win prizes for leaving comments on the design team's blogs. Check it out!
Here are a few card samples made by the DT of the brand new images;
designed by Kim

designed by Pam


Aren't they super cute?! You can purchase these sweet images along with other new releases starting today at The Greeting Farm.

Have a great day, and good luck!
Rebecca

Wild Thang!

There's a wild challenge going on at The Greeting Farm's blog. We're challenged to use some animal stamps as well as a sketch from Cindy Haffner. Check it out.


The challenge is actually a two week contest/guest designer search. They're looking for someone to work specifically with the WONDERFUL animal images by Marina Neira for the month of December. Are you interested? If so, you can read all about it here. Pretty exciting, isn't it?!

Here's my submission. I really enjoyed this sketch. I hope you try it out too.


For this card I used:

SU Not Quite Navy cardstock
SU Always Artichoke cardstock
Cosmo Cricket paper
Nestabilities Circle Embossing Die
SU Oval Punch
SU Scalloped Oval Punch
Copic Markers
White Jelly Roll pen for the faux stitching


What do you think?

Rebecca

Friday, November 13, 2009

Quick & Easy Technique


While browsing through Splitcoast Stampers I found a fun technique to try out with limited supplies. Well, not only was it fun, but the technique was the perfect compliment to the sentiment stamp I've been wanting to use to make an encouraging card for my friend. Let me show you what I mean.


By scoring some ordinary white cardstock diagonally, and adding a textured background stamp, you're able to make your own background paper. It's quick and easy too! I've added some sponging in the hopes of bringing more attention to the sentiment stamp I was using.For full instructions on how to do this, go here.Have a great day!Rebecca

Thursday, November 12, 2009

Wild!

Hello!

It's Thursday and there's frost in the grass outside where I live. The cool air is quite refreshing actually. Our two dogs, Samurai and Abbey, are really enjoying the outdoor weather. They've been spending a great deal of time chasing each other in the backyard. Here are pictures of both of them in case you're an animal lover.

This is Samurai, a five year old golden retriever. We adopted him last February. He's a real sweetie, has the run of the house and sleeps on our bed. He's a real cuddle-bum. He's a lot bigger than this photo portrays him. He's waiting for a cookie.


Here's Abbey. Sort of named after Abbey Road I think. Anywho, she's a german shepherd cross and is about 16 weeks old now. We adopted her in September. She's very sweet as well and really looks up to her dog brother Sam. She's really good at night in regards to potty training and also sleeps in our room. It's a good thing we have a big bed!

We're waiting for her to grow into her huge satellite ears. Sometimes we just call her "Ears".


For this week's challenge on The Greeting Farm's blog: http://www.splendidstamping.blogspot.com/ , we're to make a card with certain images, images of wild animals. I love it! This is what I came up with. I'm sure I'll make more.


I used Cosmo Cricket paper, SU Cardstock (Not Quite Navy & Ruby Red), and added some embellishments with a Sizzix die cut. I love the bright colours on this card. I'm not usually a bright-coloured-card kinda girl. I mostly just stick with earthy colours. Brown and red are used a lot in my craft room. What about you? Do you have favourite colours?

Hope you have a great day!

Rebecca

Tuesday, November 3, 2009

November Already!

Can you believe it's November already? I can't. I mean, wasn't it just Summer? I thought I had lots of time to start working on my holiday cards. Really. Is anyone else in the same boat?

I love using this cute little holiday set from Creative Clear Stamps. There are so many different card designs you can make from it and the sentiments make it really easy. If you're going to purchase just one set this year, make it this one!


Hope this helps to inspire your holiday card making. Have a great day!

Rebecca

Sunday, November 1, 2009


I made this card for a challenge given at http://www.splendidstamping.blogspot.com/, and gave it to my son with a healtfelt sentiment inside. Home is definitely wherever my eleven year old son Evan is. He brightens my day.

I used Cosmo Cricket paper, added some detail to the stamped image, such as the zipper on the sweatshirt and two popular logos on the shirt and hat. Just like his favourite clothes!

Both the stamp and sentiment are from The Greeting Farm's set, "My Guy Ian".

I love my son!

Rebecca
http://www.thepaperbug.blogspot.com/

Followers